Welcome to Material Musings, in this video I share some ways that I use fabric scraps and create mini projects. I show you some of the panels and wall hangings in progress, waiting for either some stitching, beading or to be added to another project.
I also share how I create these fun badges, they will either be placed on another project or can be used as a tag or in an art journal spread. I will be adding some more stitching to the pieces and maybe some beading to each of them.
How are you using your fabric scraps, or your supplies that you have neglected?
If you decide to create them, remember to share on IG and tag me @realityarts
Check in your own supplies to see what you have. Here are some of the additional supplies that I used:
Brads - https://amzn.to/3VsNA7c
Hot Glue Gun - https://amzn.to/3vtsb32
Embroidery Thead - https://amzn.to/3VsATJr
Ribbon - https://amzn.to/3PvE3Zh
Fabric panels (available in different colors) - https://amzn.to/495SutS and check out - https://amzn.to/3Tq9ghM
Have fun!
Before you go
Join us for FREE on Patreon or try out one of the Tiers on the 7 day free trial:
Welcome to Material Mondays! Today, we are delving into the world of slow stitching and completing textile and fabric artwork. You can check out the accompanying video below, I'm excited to share with you the process of working with different materials and adding intricate stitches to create textile art pieces.
Last week, we looked at an incomplete piece that I've been working on, in this video and I'm happy to say that it's now complete! I added additional stitching along the figure's body and clothes, defining the edges and creating shadows with darker threads. The completed piece measures nine inches by nine and is titled "Rest A While."
I'm considering framing it, but it will also be available for purchase unframed on my Etsy shop or website.
Here is last weeks video if you missed it
New Textile Art
Working on small stitches, is something I find incredibly enjoyable. It allows me to add intricate details and textures to my artwork, giving it a unique look and also enables me to experiment with various stitches, threads, and materials.
I enjoy working on multiple projects and I find that when I come back to these unfinished pieces, that I am able to look from a new perspective. Stepping away from a piece can be a refreshing way to gain new insights and inspiration.
Slow stitching and completing textile and fabric artwork is a journey and It's about finding joy in small details, experimenting with materials, and letting inspiration guide your hand. I hope this glimpse into my artistic process has inspired you to pick up your needle and thread and embark on your own creative adventure.
Join me next time on Material Mondays as I continue working on this piece and explore more stitching techniques. Until then, stay inspired and keep crafting!
Join me on Patreon!
Check out exclusive content on Patreon - sign up for the 7 day FREE trial and get access to over 300 'Patron Only' content.
In
today's art journal video, I am thrilled to share with you a unique and
eco-friendly approach to creating art journals using recycled materials,
specifically Tetra Pak cartons. These cartons, commonly used for packaging
beverages, pose a recycling challenge in many areas. However, instead of
letting them go to waste, we can repurpose them into beautiful and functional
art journals that provide endless creative fun.
The Need for Recycling and Repurposing
Recycling has become
increasingly important in our efforts to protect the environment and preserve
valuable resources. By recycling and repurposing, we can
reduce waste, conserve energy, and reduce the harmful effects
of pollution. Tetra Pak cartons, due to their complex composition, often
present a challenge for local recycling centers, and this led me to explore alternative ways to reuse these
cartons and turn them into something meaningful.
Creating Art Journals
Art journals are a great way to express our creativity, capture our thoughts, and document our
experiences. They serve as a personal sanctuary for self-expression and
reflection. By repurposing Tetra Pak cartons into art journals, we not only
divert them from landfills but also breathe new life into these everyday
objects.
The Creative Process:
In future videos, I
will be sharing the step-by-step process of creating these art journals with my
patrons. From preparing the cartons to binding the pages, each stage offers
opportunities for customization and personalization. You can choose to leave
the carton's original design intact or transform it with paints, collages, or
other mixed-media techniques. I have also reused the cartons as temporary plant pots in the garden and
there are a range of other creative projects that you can use them for.
I would
love to know how you use yours, and whether you have tried using them for a
creative project, by transforming
Tetra Pak cartons into art journals it provides a unique way to express your
creativity while making a positive impact on the environment.
Join us on
Patreon if you would like to see how I put the art journal together, and
remember you can sign up for a 7 day FREE trial and view over 90 Patron only
posts.
Welcome to my latest art project where we will be creating a recycled art journal using an old catalog.
This project is quick, easy and affordable, and the best part is that nothing will be wasted! You get to use some of those store catalogues that you have been collecting and create some wonderful projects.
To start, find yourself an old catalog, like this Tesco's home catalog that I'm using. The first thing you need to do is rip out about half of the pages. This is because we'll be adding collage and texture to the pages, so you want to make sure you have enough space to work with. Go through the catalog and rip out every 2-3 pages. I save the ripped out pages to use later.
Once you have removed the pages, stick together sets of 2 or 3 pages depending on where you ripped them out. Allow the pages to dry and then reinforce the spine with some masking tape on the inside. If you are going to be adding paint it stops any bleed through on the other pages.
I also add masking tape to the edge of the pages that I have stuck together This will also make it easy to turn the pages.
With the pages left over, look through them and cut out images or words that speak to you. I select colorful patterns and shapes and these will form part of your collage. This is a great way to still create something without having to have a lot of art supplies or anything fancy. All you need is a catalog, glue, and some basic tools.
Come and join me in the next video, I'll show you how to work on some of your pages, and ideas from other recycled journals that I have created. This art journal will be a space for you to fill up over time, write down your thoughts, and enjoy the creative process. It's all about play, so have fun with it!
If you would like to take it a step further and make your own stamps and stencils, then check out my FREE online course Recycled Stamps and Stencils where I show you how you can take items that you may have around the home and turn it into something that you can use in your art journals.
You get a video on how to create the stamps and stencils, a digital download of the stamps and stencils that I created, background papers and more! Check it out HERE
In Material Mondays this week I share working on a painted fabric. The surface was prepared previously and I took the time to work on a few images which included this vase with flowers and some figures.
This is a great way to prepare your fabric for stitching projects and can also be a standalone project.
In the video this week, we're going to be painting on fabric before stitching! This is a great way to add some extra interest to your fabric project and make it look more unique.
Painted art journal page with glitter
You can use a variety of creative supplies and paints. I am using the brand called Tulip and I have listed the supplies below that I use to paint on fabric.
I usually use recycled fabric, cottons etc where I need them for specific projects I will order them online.
By painting on fabric before stitching, you'll be able to create some really beautiful and unique pieces. You can see the other videos in the Material Monday's series.
Preparing the fabric with paint
Check out the video to see how the fabric progressed:
My Amazon store - Click HERE to see my Store suggestions
Check out my Art Supplies on Kit: https://kit.co/Realityarts
Thank you for joining me in my art studio. We all have 5 minutes that we can give to creative play, why not see how you can fit creativity into your every day
Today in Material Mondays I show you how you can create a stitched word sheet with some encouraging words and inspiring phrases.
I took a selection of embroidery threads
Selected a white tea towel to write the words on. This was quite thin cotton, and so I doubled the thread, check out the video to see how it progressed.
If you want to try it yourself, you can see the links for supplies below:
Embroidery threads - https://amzn.to/3EyxKQ8
Embroidery Kit for beginners - https://amzn.to/3fZ00kF
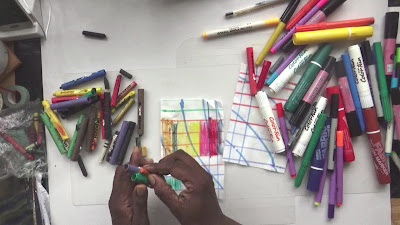
Welcome to Material Mondays this week where we look at working with Fabric pens to create designs on our fabric pieces.
You can use them as a layer on your fabric or as a finishing touch. I like to add stitching as well as other elements.
I share with the a selection of fabric pens that I use, they come with different nip sizes for different effects that you may want to create on the fabric.
Amazon has a wide selection of fabric pens that have dual uses - you can check some of them out here - https://a.co/bNs0Iya
Material Mondays
You can also check out some of the other videos in the Material Mondays Series below.
Week 1
Week 2
Week 3
Week 4
Check out the free resources listing in the side bar of the Blog and sign up for one of the FREE courses.
Join me for Material Mondays, a weekly look at stitched project, painted and dyed fabric and more
Check out the video below
What kind of fabric or textile projects are you working on at the moment? leave a comment and let me know. I like having at least a few on the go at the same time or have them at different stages, adding variety.
I love using recycled materials and had gone to my charity store and picked up a phone case. It was slightly too big for my phone so I thought I would make use of it and create a mini art journal.
I talk about the journal in the video below, and I have included some close up images of the pages as well.
On the front of the art journal I used some of my favorite handmade paper infused with gold, looks lovely doesn't it, one of my favorite colors which I use a lot when painting too.
One of the motivations for the journal was to use the elements that I had been holding on to for what we call 'best' or 'one day' but that day never comes. It is important to use your supplies rather than holding onto them for that one special day. Allow yourself to be included in the special day and use it on yourself.
The journal is made up of handmade paper and I have included making use of space where I can add additional elements If I were travelling with the journal - a water brush and some water colors always travel well and have minimum cleanup.
I added sentiments that are reminders 'You are beautiful - Shine your Light' reminds us that we all have something to offer and that we need to not only shine our light for ourselves, but for others who you are impacting and helping them to be brave or step out and shine their own light.
How many times have you been self conscious about what you are doing, not because you can't do it, but you are listening to the negative talk of others. Sometimes it is that throw away statement that can do the most damage - but you have to 'Dance like no one is watching' again, your being who you want to be will encourage others to keep going.
Each page has either an encouraging word or scripture, and also space for adding doodles or mark making.
Every page is a constant reminder to dream big, follow your heart and do the things that bring you closer to your goals.
Some of the sentiments I use especially when working on a challenge and I am working on two at the same time, the 100 Days of Handmade Foam and the Ultimate Blog challenge. There are some days that I have not felt like posting, and sometimes you don't, and you find a way of dealing with it and then getting back on course. I take the necessary breaks that I need, all the time reminding myself of my overall goal.
Explore, Imagine, Dream is the title of this page. I recommitted myself to share as part of the blog challenge, to not only encourage myself but others as well - I am sharing what I love, creativity and the process.
This pages sentiments - You are unique, a miracle, don't ever compare yourself with anyone else. Take a look back, you have come a long way, this is not your destination.
I hope you find the things that motivate and encourage you and that you take one step in front of the other to reach the goals you desire.
Blessings!
********************************************
100 Days of Handmade Foam Stamps
If you would like to see the stamps daily you can check out my Instagram HERE
What do you do when you have a phone case that is too big for your phone? Make an Art Journal!!
Phone Case waiting for the magic!
Check out the video to see what I did to transform it
Here are the finished details with a lot of pattern and mark making at the front and back
The interior has been created with water color paper cut to size and then glue bound.
It is always great to have a new art journal on the go and this one fits quite tidily in my bag. I shall be sharing some of the pages in the coming weeks and showing a few processes using both collage material and acrylic paints, so would love you to join me.
Let me know if you have recycled and repurposed an unusual journal.
One of the things that I have always done is make something out of the things that I have, looking at things with new eyes and seeing what else I can do with them.
Sculptural Loom made with Paint Brushes
In this video I will be sharing with you how I alter old paint brushes and marker pens to use in another creative project. I will be showing you how the sculptural looms came about for me. It is essentially a loom that you create a woven piece on then you decorate with beading and jewelry and create a mini wall hanging.
In the next video in this series I will share with you how I weave on the looms.
Thank you for joining me on this creative journey. One of the things that I want you to leave with is that you can try any creative activity that you would like. You don't have to stick to one thing you can see what it is like and make your mind up from there - life is too short to be holding yourself back!!!
Other Great News!!
Life Book Taster session have been EXTENDED until 18th October, so you have a bit more time to go through all the FREE sessions. Let me know how you get on with mine, and there is a question about the critic that it would be great to get your perspective on. If you haven't yet had a chance to sign up you can do so HERE
Registration has opened for Life Book 2021 if you are considering Signing Up you can get 20% discount using the code FEELHAPPY20
I have two great sessions to share (we will be working with a clay project and a slow stitched project)
When you get a chance subscribe to my YouTube channel if you haven't already. I have lots of tutorials and art videos coming up for you to continue to wet your feet and enjoy. Tomorrow I will be sharing in the Arts and Wellness Cafe, you can see back recordings HERE
So you got some more toilet rolls hanging around, lets see what else you can do with them.....simple...create another journal, a bigger one this time!
Toilet Roll Journal 2
Recycled Journal
In 31 Creative things to do with Recycled materials I have been showing you different things that I have made that you can try for yourself or a project with children, as a gift, that can impact where you live, your environment and more - you know it!
This journal came about in a very similar way to the Journal I showed you yesterday and you can see just how I put it together HERE.
On the front of the journal you can see that I used Quinoa to decorate the front, again using something that you may have in your home supplies that you might ordinarily throw away. Think about the different things that you have that can create texture or add something different to your project.
Front Detail - Toilet roll journal
back detail - Toilet Roll Journal
These pages were constructed differently to yesterdays one and I made it slightly bigger, and enabling me to increase the size of the tags that I made. If you want to see how this one was made you can check out the post HERE
I think that these journals are so cute, remember if you are using foodstuffs to varnish it and seal it in well. If you can come up with alternative uses why not leave a comment, let me know how you get on.
I will doing an ‘All About Journals’ Challenge on my YouTube channel where I show you how you can make your own journals from recycled materials such as catalogs - you can see what I did with a John Lewis Catalog, old books, and more – whether you are re-purposing, reusing or altering, you can make something that is unique to you. Sign up to my mailing list HERE and you will be notified when the videos go live.
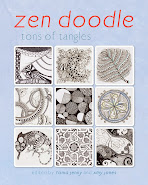
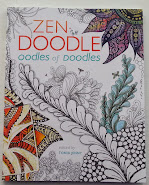
Realityarts - Creativity Book Shop - Some really great titles for you to dive in
Creative Resources
Affiliate Links
Some links on this site are affiliate links. If you purchase a product after clicking an affiliate link, I receive a small percentage of the sale for referring you. I only have links to products that I would buy myself. Purchasing through affiliate links is an easy, painless way to help out your favorite artists/bloggers at no extra cost to you. Thank you for your support!


%20(Instagram%20Post)%20(2).gif)


%20(Instagram%20Post).gif "Join us on Patreon")


.jpg)

.jpg "Choosing embroidery threads")

.jpg)
.jpg "Stitched projects with Amanda Trought")


.png)
.png)
.png)