Showing posts with label imagination. Show all posts

Sunday 5 November 2023

Do you have a story that could help others? - Soul Hunger Starts Monday 6th November!


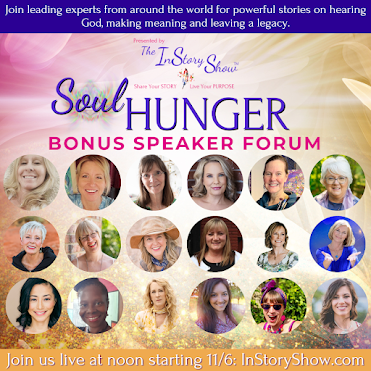
Are you ready to Nourish Your Soul, Tell Your Story and Shine Your Light?

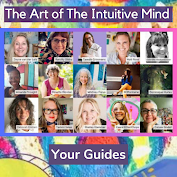
You are invited to join me and a whole community of women for The InStory Show Soul Hunger: On Hearing God, Making Meaning and Leaving a Legacy.

Join this powerful free series on Soul Hunger and how we heal that soul hunger by nourishing our souls, telling our stories, and shining our light. When you join the series, you will find that you are not alone. You are standing beside women from all over the world who are finding their voice and sharing their stories.  Starts Monday 6th November 2023


We are here to inspire you so that you can turn around and inspire the next woman who is ready to be seen for who she really is. I thought it was important to participate when Devorah asked me to be a speaker, everybody has a story to tell, and now is the time to tell it.

In this series, writers, coaches, spiritual teachers, artists, body workers, healers and creatives in all fields will help you get clear, unstuck and discover how to shape your story, trust your intuition and access a whole new way to nourish your soul and make a difference with your wisdom and your story.


When you sign up for The InStory Show, you will discover new and powerful ways to:

* Share your wisdom and your story

* Create with more ease and flow

* Trust yourself, your story and your vision

* Bravely find and follow the calling of your soul

* Strengthen and follow your intuition


We look forward to having you join us as you access the power of your imagination, intuition, higher guidance and expanded consciousness!

*********************************************************************

Before you go....


Tuesday 9 February 2021

100 Day Project - What will you do?

So I decided to join in with the 100 Day Project which started on the 31st January. For my project I decided to learn Embroidery stitches.  With some of the fabric pieces that I have been creating I wanted to add some new stitches, so this was an ideal time to support my daily creative practice and learn some new techniques.


I have had this book of embroidery stitches but never committed to learn any of them so it just stayed in my bag that I keep my machine threads.


I have had embroidery hoops for as long and they too just sat around as I never found the time to try them out.  These are my first embroidery stitches and you can follow me on Instagram to see which ones I complete.


I am looking forward to learning all 100 stitches and the emphasis is on learning new stitches.  I know they are not perfect but the whole thing about the 100 day project for me is the following:


  • Committing to the 100 days
  • Learning a new skill that I can apply in my creative work;
  • Remember that I am still learning the stitches and I can't compare myself to someone who has been doing it for years;
  • Showing up for myself;
  • Reminding myself that it doesn't have to be perfect for me to share what I am doing;
  • Congratulating myself for every day that I do show up
  • Have fun!!.


So if you are up for doing a 100 day project come and join us #100dayproject


Looking forward to seeing what you decide to do, remember there is no pressure, just continue to show up for yourself, don't compare yourself and have fun!  Check out the last 100 Day project that I did a couple of years ago where I use pastels for the first time and I have created a few videos of the process - 100 Days of Pastels HERE

Stay blessed and be a blessing!


Saturday 21 January 2017

31 Creative Things to do with Recycled Material - Tea Boxes


Tea Boxes Decorated


What are you going to do with your empty tea boxes that you have, throw them away, recycle, put them in the compost or do you make something from them? Yesterday I showed you a way to alter them and make something crafty, here are a few other ways.

Always one for experimenting I wanted to see how many different ways the tea boxes could be decorated based on some of the supplies that I have. Whatever you have in your craft supplies there are some amazing techniques to try.


Here are 4 ways that I decorated mine so far, this is a great way to use up some of those smaller pieces of your supplies – paper, embellishments that may be too small for one of your larger projects but may be just right for this one. (No it isn’t an excuse to start to hoard, though it can sometimes feel as if you are surrounded by a mound of ‘use it for later’ supplies).

I will be doing a series around the tea and tea boxes, so watch this space, and even follow along. I might even do a monthly tea box challenge with some giveaways each month!

So for the boxes I covered this one with handmade paper, brads and topper that was a free decoupage topper form a magazine. (You can make your own decorative paper with painted recycled paper. I then tool string and beads to decorate the front, and stamped the inside with a homemade stamp.

Quinoa Box

When I had loads of outdated quinoa, I wanted to use it to make a creative covering for the box and applying glue sprinkled it all over and let it dry. I then finished off with broken jewellery, ribbon and another homemade mini box.

Friend Box


Covered with stamped masking tape and glitter paper, with a tag on the top with the stamped message of friendship. I also used a clay embellishment on the top.

Sequin Box

This has handmade paper, paint, sequins and an encouraging word tag on the top. If you keep the embellishments simple your box will last longer and be more sturdy. It is great fun having these decorative containers and it would be great to do a series.

You can see how I went about altering the boxes HERE

Perhaps you will join me with the monthly makes and you can sign up HERE if you want to know when a new one is coming.

Saturday 16 April 2016

Recycled Projects - Are Back! - Crafting a Cup

Happy Saturday!   So great that you could join me today.  I wanted to let you know that the Recycled Project posts are back and I will be sharing things that you can do with recycled materials.  There are a lot of crafty things that you can do with recycled materials.   You will have endless amounts of fun re-purposing, reusing and just making stuff that you might be able to use around the home or in your crafting space.


This is also useful if you are creating on a budget and want to find some inexpensive ways of creating the products or equipment that you might need for a fraction of the cost.

In one of my previous posts I shared a book case I made from Cardboard boxes

Cardboard Bookcase

which was made from packing boxes below!

The foundation of the bookcase made from Cardboard

I had great fun making it, was able to make it fit the space I had in mind.  I have since been making other things, and there seems to be more recycled material than time to make something new and exciting, but I am giving it a go.

I have come up with a few ideas for things to do with plastic bottles and newspaper, and again it is quite exciting what you can do with a little bit of imagination.

I have made a storage container this week, which will be used to hold some of my tools in the studio, see photos below, you can also see the video so that you can see it from a different view point.


So many things can be made from these two materials

So many things you can do with plastic and paper!

There is a wealth of things that you can create with plastic and paper, here is one way in which you can create an inexpensive storage container, that can be used in a variety of ways in your creative space or around the home.

The design formed itself and began to take shape once the paper was added.

It is made using the top of a plastic container and newspaper.

I love the way the paper lays on the plastic

The newspaper is rolled and covers the plastic to get the textured effect.

I created a stand from the rolled paper

It is dried and painted then given the brushed gold effect with metallic paint. I really like the detail on the handle and the pattern around the container.

Painted cup, which is varnished

It is then sealed with varnish and is water resistant, but to preserve it don't actually use it as a cup (lol).

With some thought you could allow your imagination to run away with you and create other shapes and styles - how about a series.

Do come back next week to see what else can be made, subscribe and sign up to the emails, so that you don't miss out on a post!


Related Posts Plugin for WordPress, Blogger...